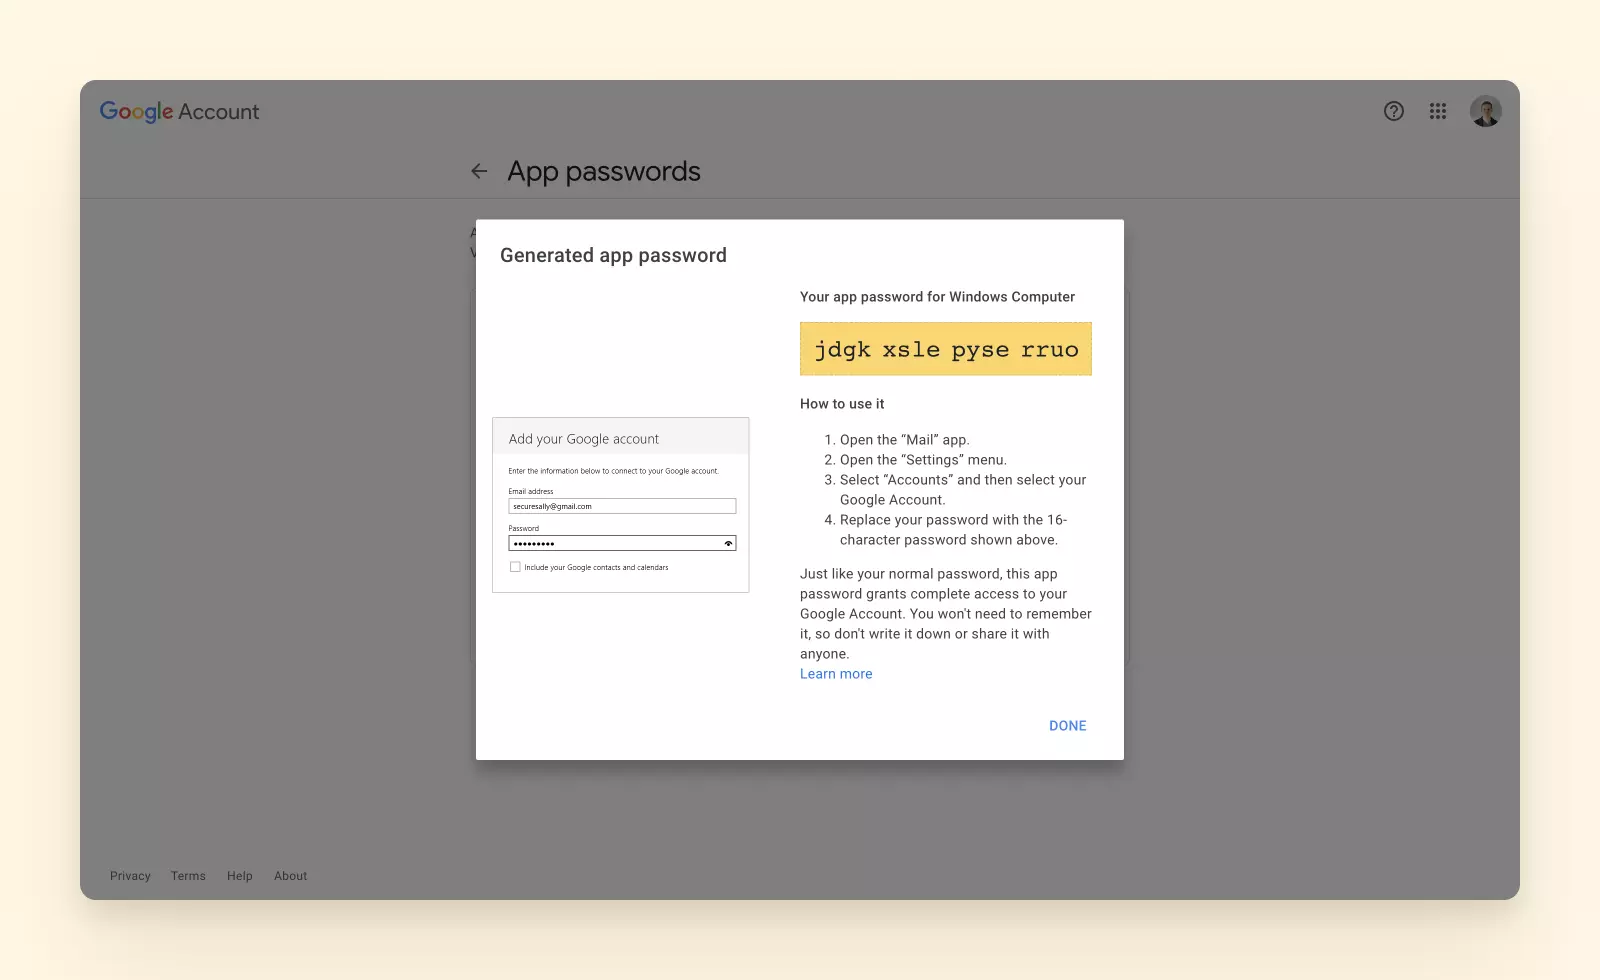
How to Generate a App Password from Gmail Account
Note: if you are facing issue during login to your Gmail account. please follow below steps to know, what exact settings are required to be enabled from Gmail, Google Workspace.
To authorize your less secure applications in Gmail and G Suite, the user needs to follow a few steps as both Gmail and G Suite administer certain policies to safeguard your data. Due to the strict security policies, certain users are unable to use a few applications in Gmail and G Suite as their devices are not compatible.
Google blocks some devices and apps and a user might encounter a failure in sign-in attempts as they do not match the security standards. Google blocks them as anyone can break into the device or apps as it is easier to do it and that's why Google blocks it to safeguard the data.
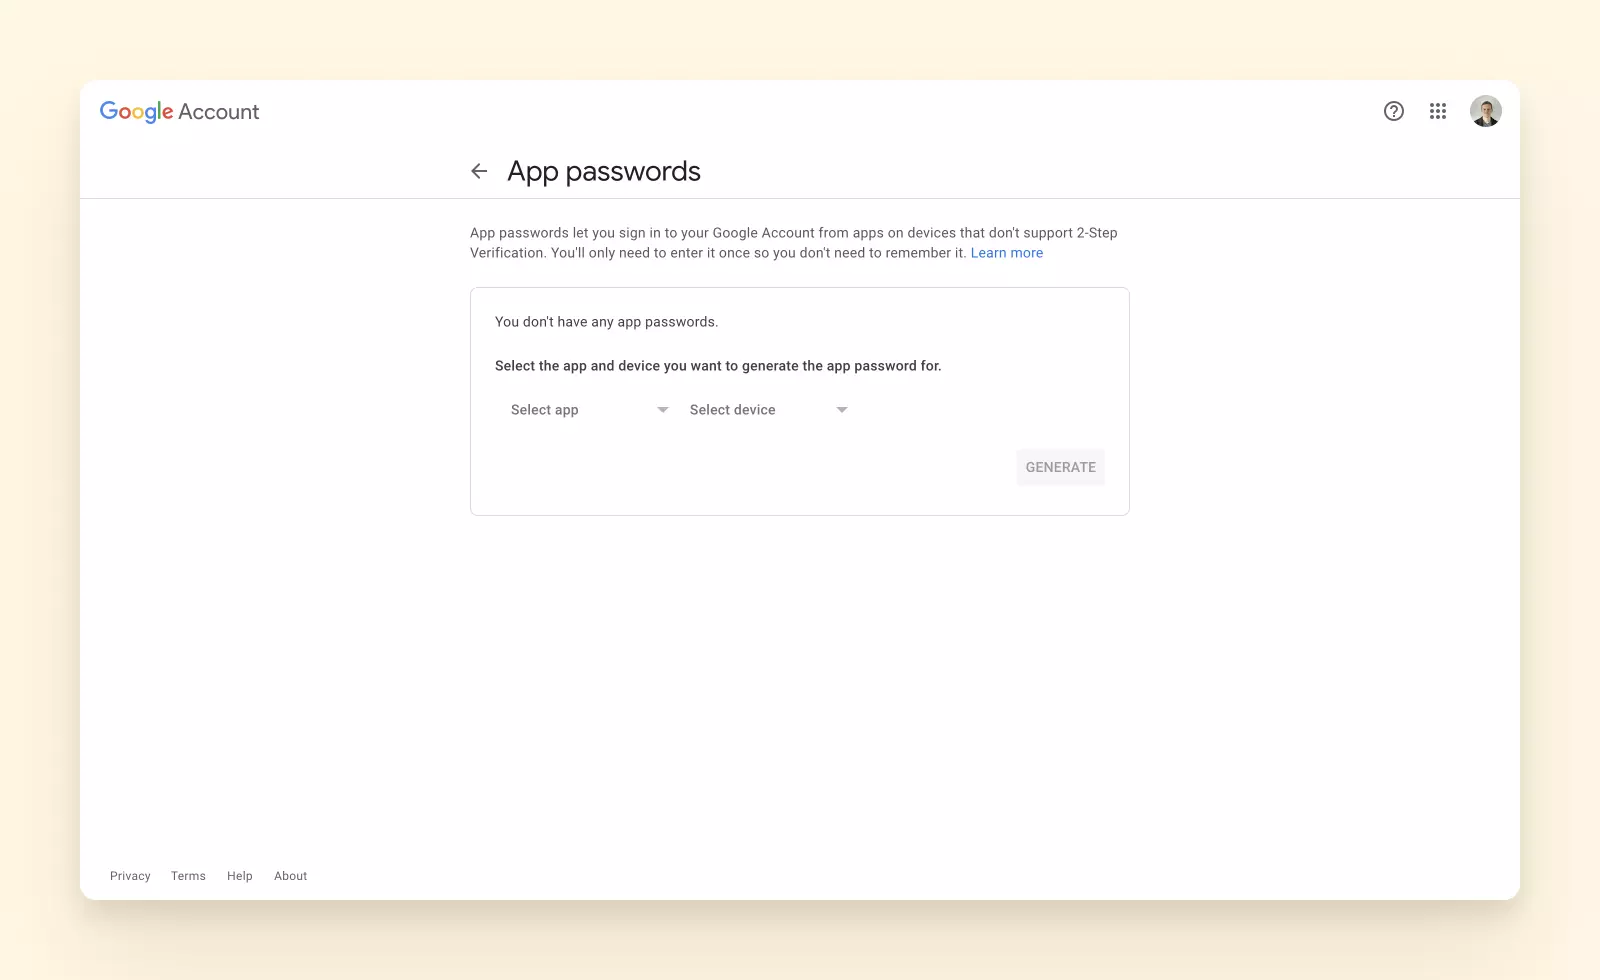
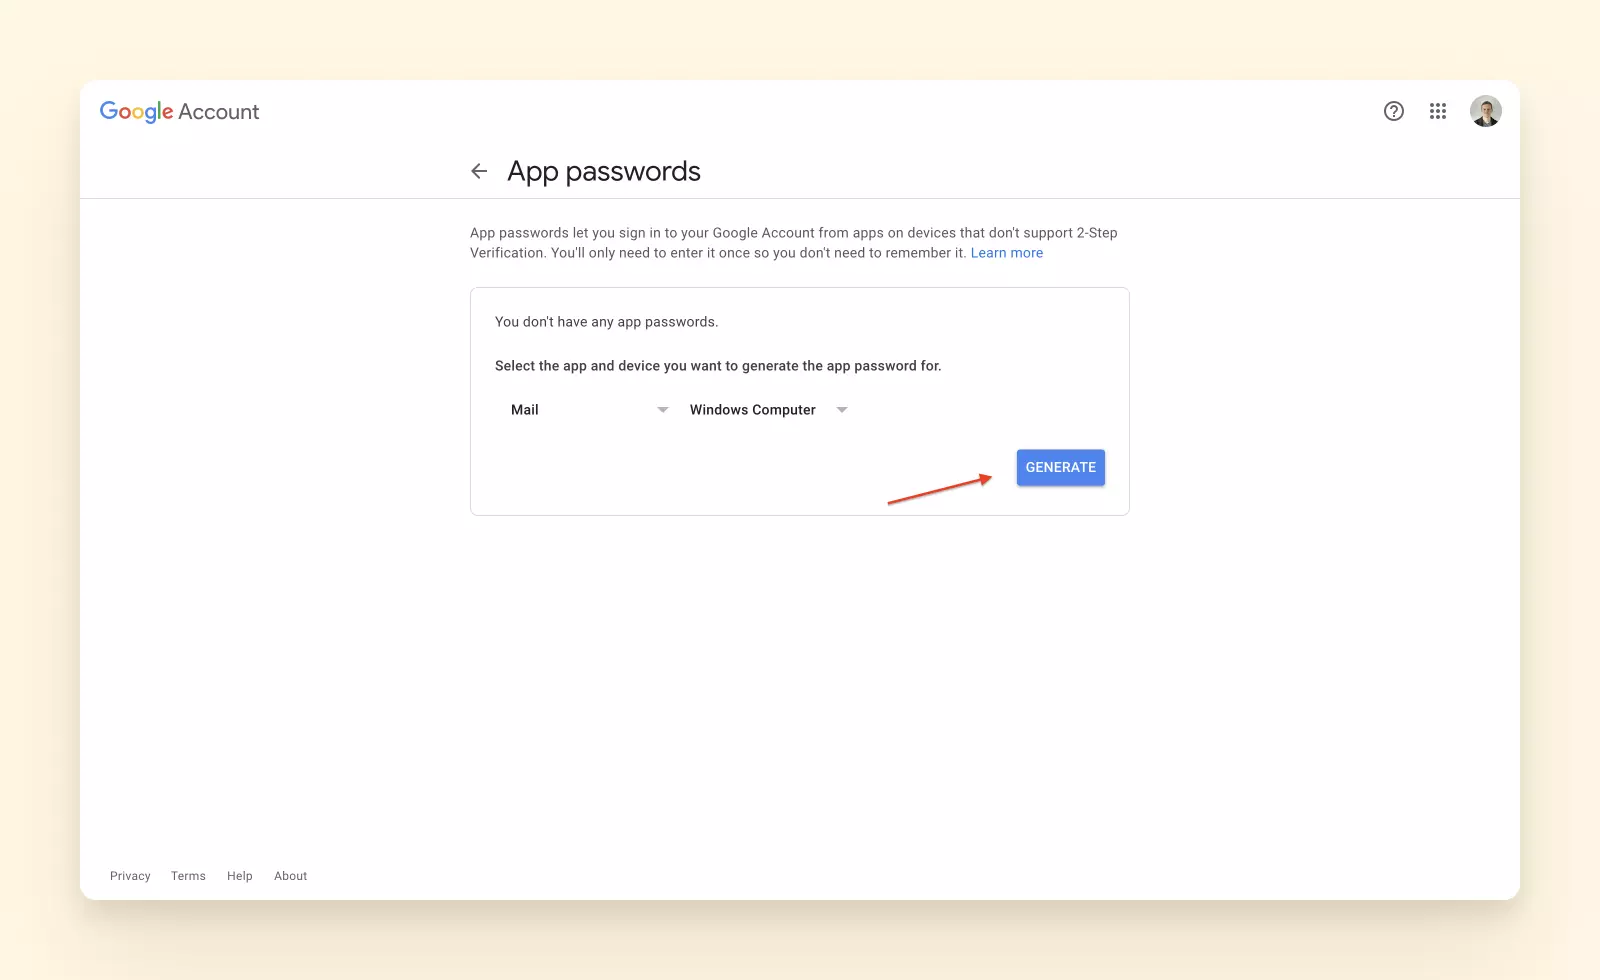
You must have 2-Step-Verification enabled before setting up an application password:
https://myaccount.google.com/apppasswords

you can directly access the App Passwords page by visiting [https://myaccount.google.com/apppasswords]

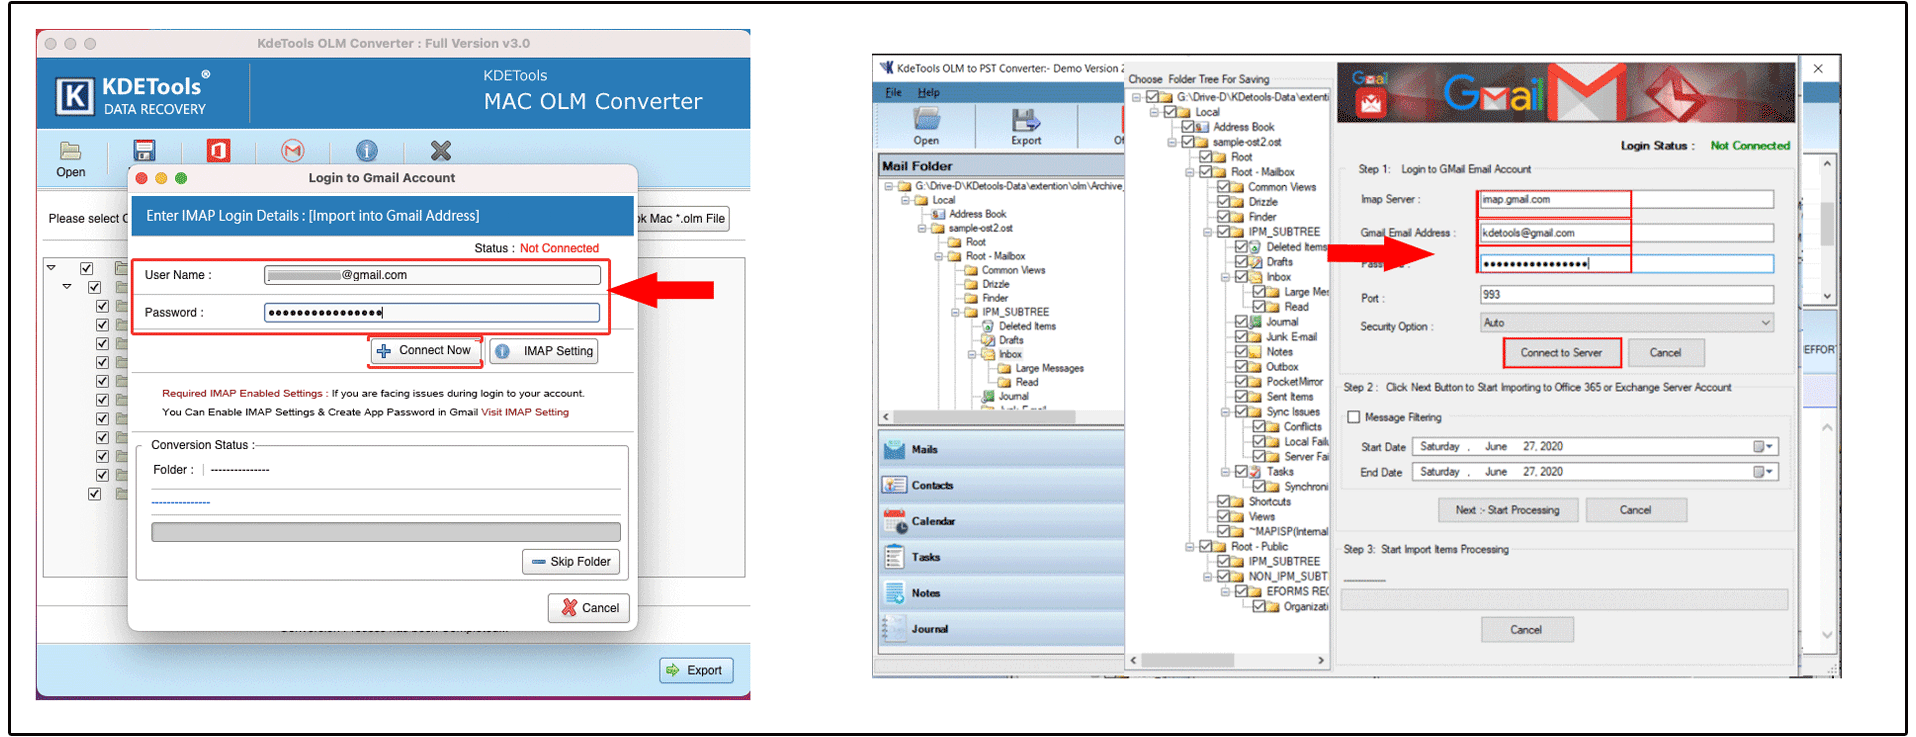
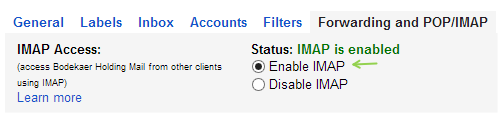
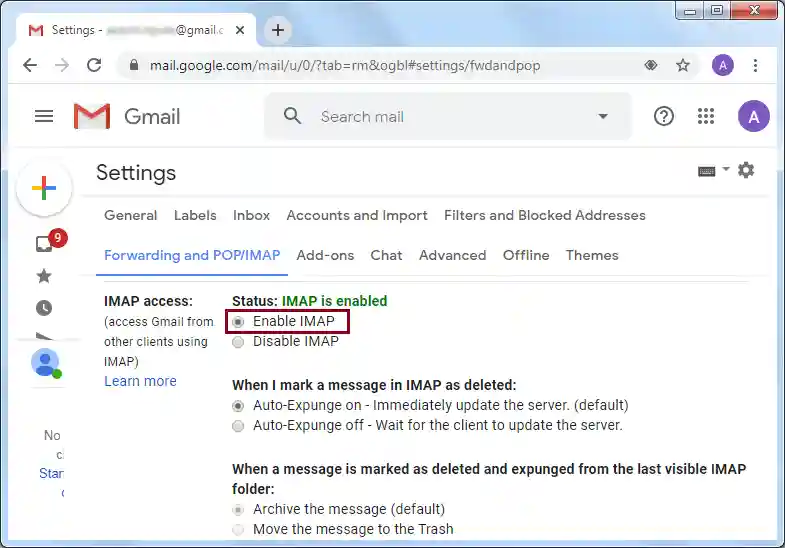
Enable GMAIL IMAP Settings
Sign in to your Gmail account by using a browser that is supported (Google Chrome, Firefox, Internet Explorer, or Safari)..
make sure that Enable IMAP is selected,
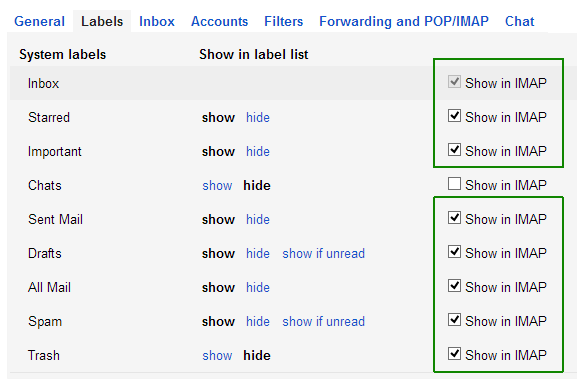
It therefore requires you to select Shown in IMAP for all labels,


![]()
D - 478, Sector - 7,
Dwarka, New Delhi - 75
India
Call Us
91-9555514144
You can also find us:
![]()

![]()
KDETools Software® is the Registered Trademark of KTools Software Pvt Ltd
© Copyright 2019 www.kdetools.com. All Trademarks Acknowledged.