Create Azure Client & Tenant ID to Login Office 365
App Registration in Microsoft Azure for Office 365 Migration
Go to the Microsoft Azure Portal & Sign In to the Azure portal using the Admin [administrator] Account
If your account gives you access to more than one tenant, select your account in the upper right corner. Set your portal session to the Azure AD tenant that you want.
Steps:1 click here : https://portal.azure.com/
Steps:2 You can login to azure portal for "App Registration"
Steps:3 Go to Azure "Active Directory"
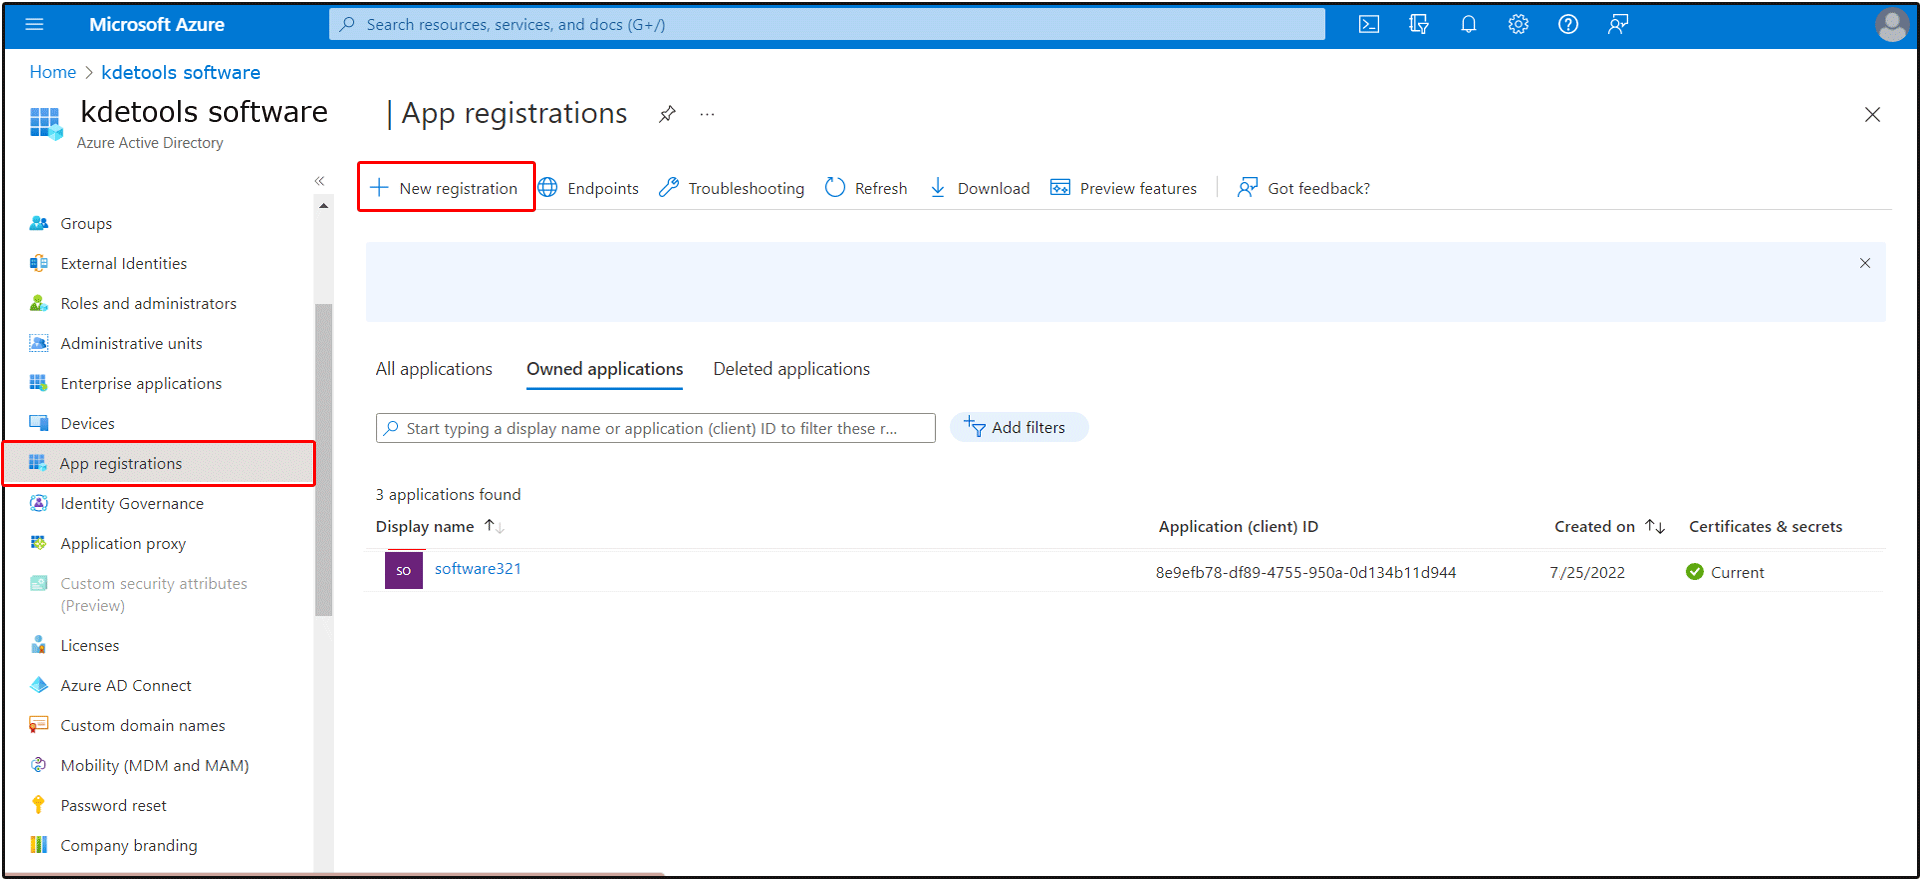
Steps:4 Then to click on "App Registration"
Steps:5- New registrationas shown below:
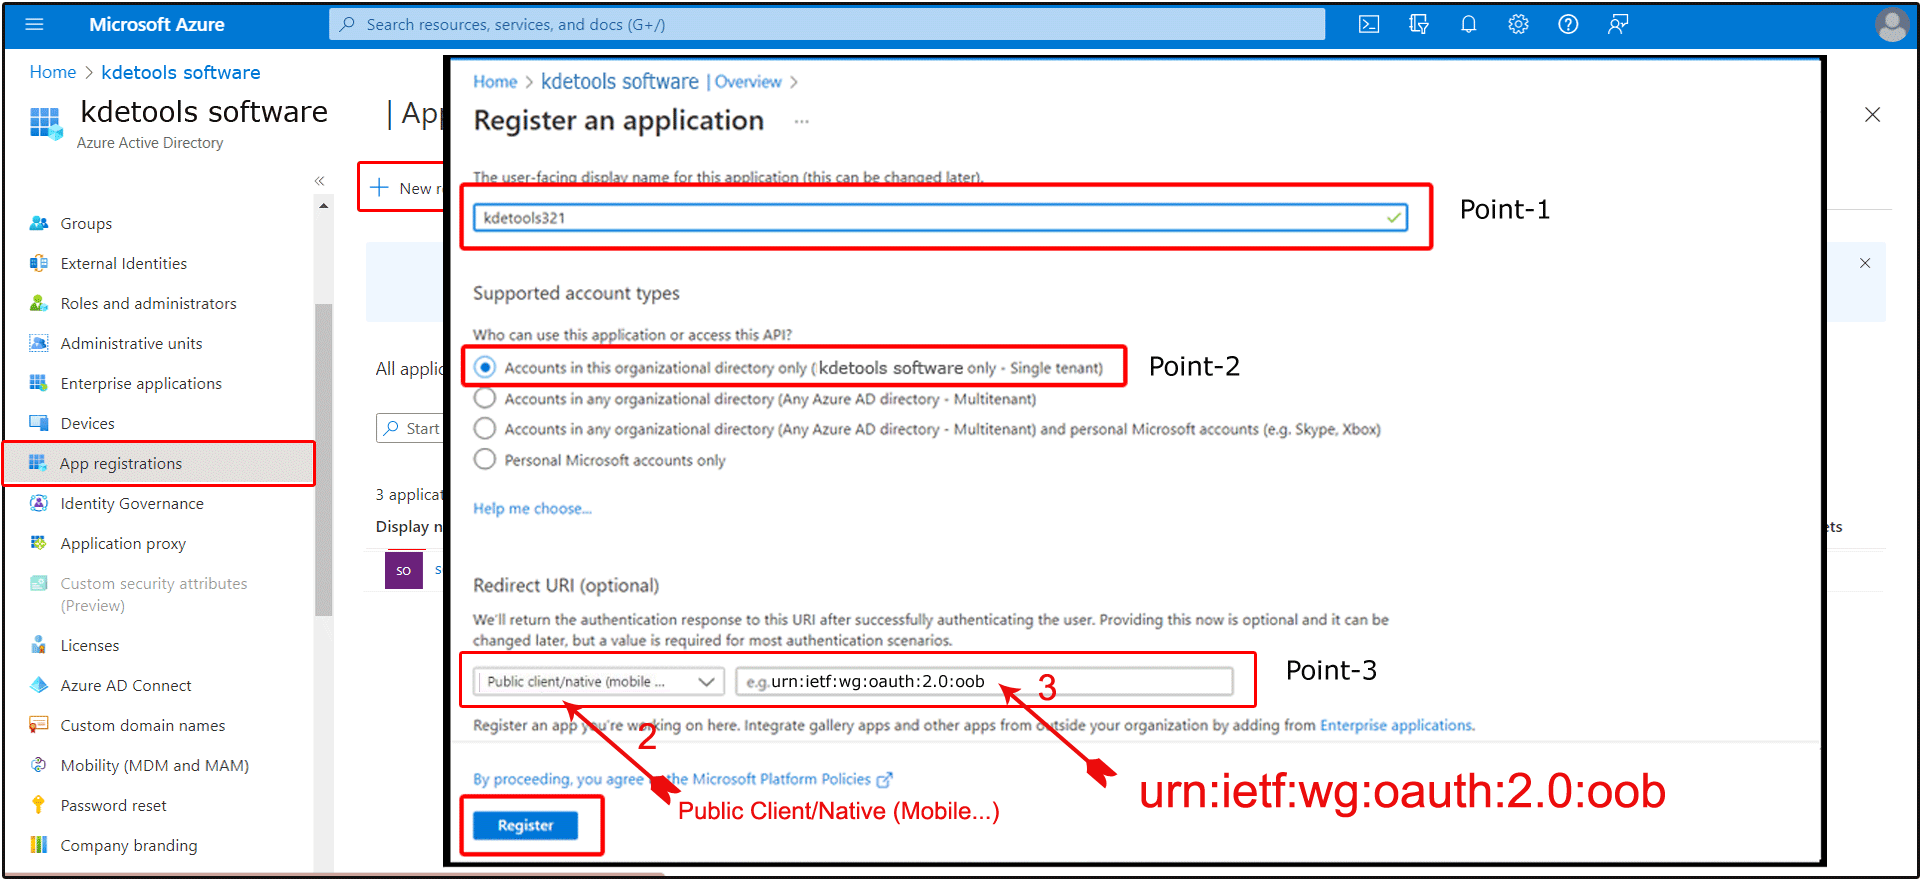
Steps: 6- Registration an Application - Follow Step by Step Guide:
Tab1:- Enter App Name
like as - "kdetools-zimbra-to-office-365-converter"
Tab2:- Supported Account Type -
Select Option:1: -Account in this organization directory only(---- Only + Single tenant)
Tab3:- Redirct URI Type ->>
Select a platform "Public client/native(mobile & desktop) -->>
Tab4:- Enter URI Code "copy & paste":
"Use a default value code of urn:ietf:wg:oauth:2.0:oob
If you are fullfill the completly details then Click to "Register" button and Go to NEXT steps.
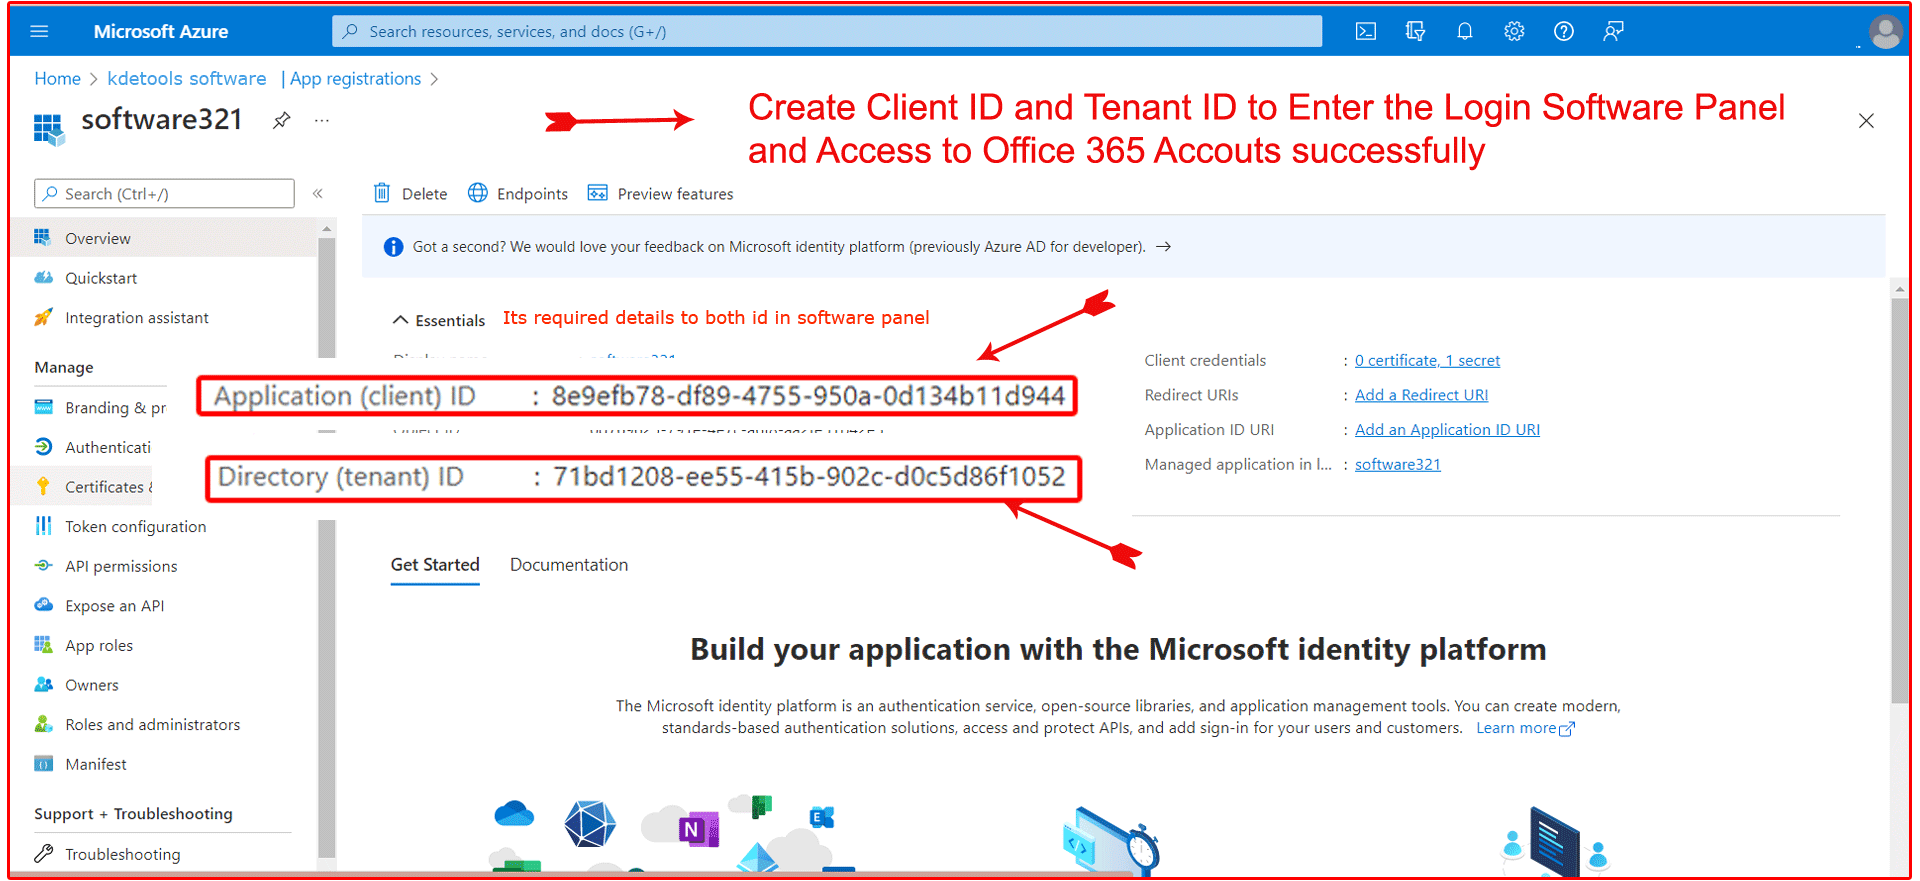
Steps:7- Successfully Show Your "App Registration" ID
"Note" Application "Client ID" and Directory "Tenant ID" - It is required for Office MFA Office 365 Login Time
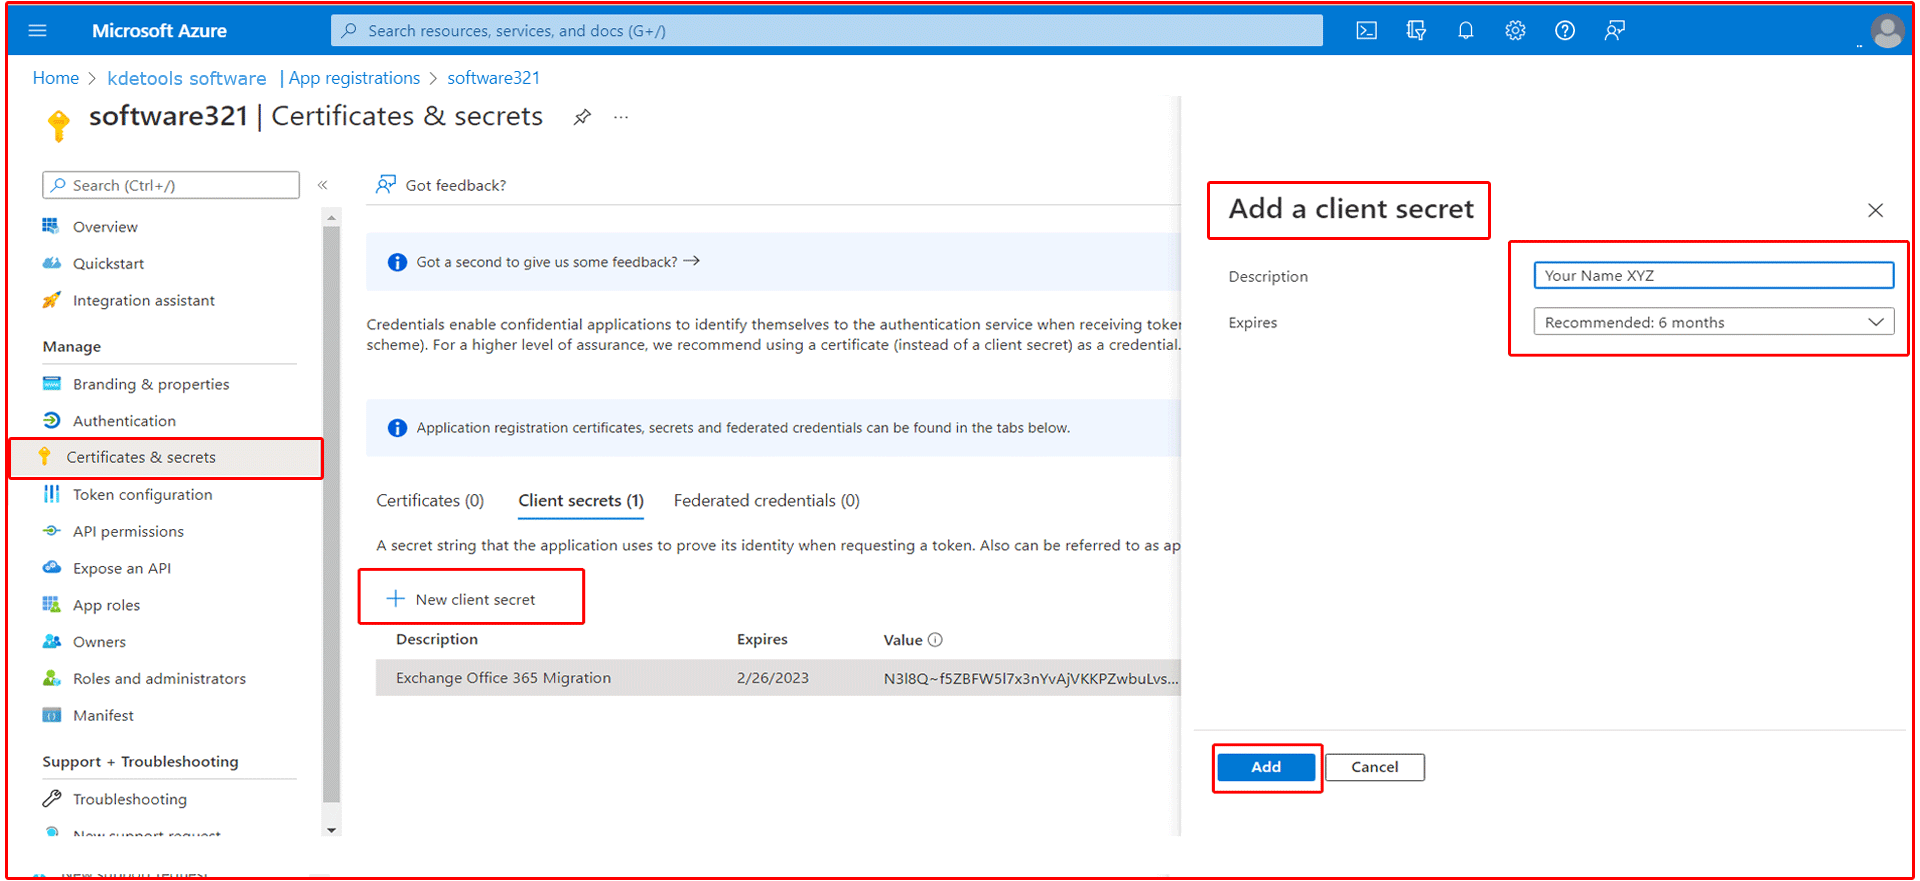
Steps:- 8- Go with Generate Certificates & secrets Panel
Tab:1- Go to "Certificates & secrets"
Tab:2- click to Add "New Client Secrets" option
Tab:3- display " Add a Client Secrets": - Enter the "Enter Description"
Tab:4- Select Expires Date for valid
Tab:5- Click to "Add" button
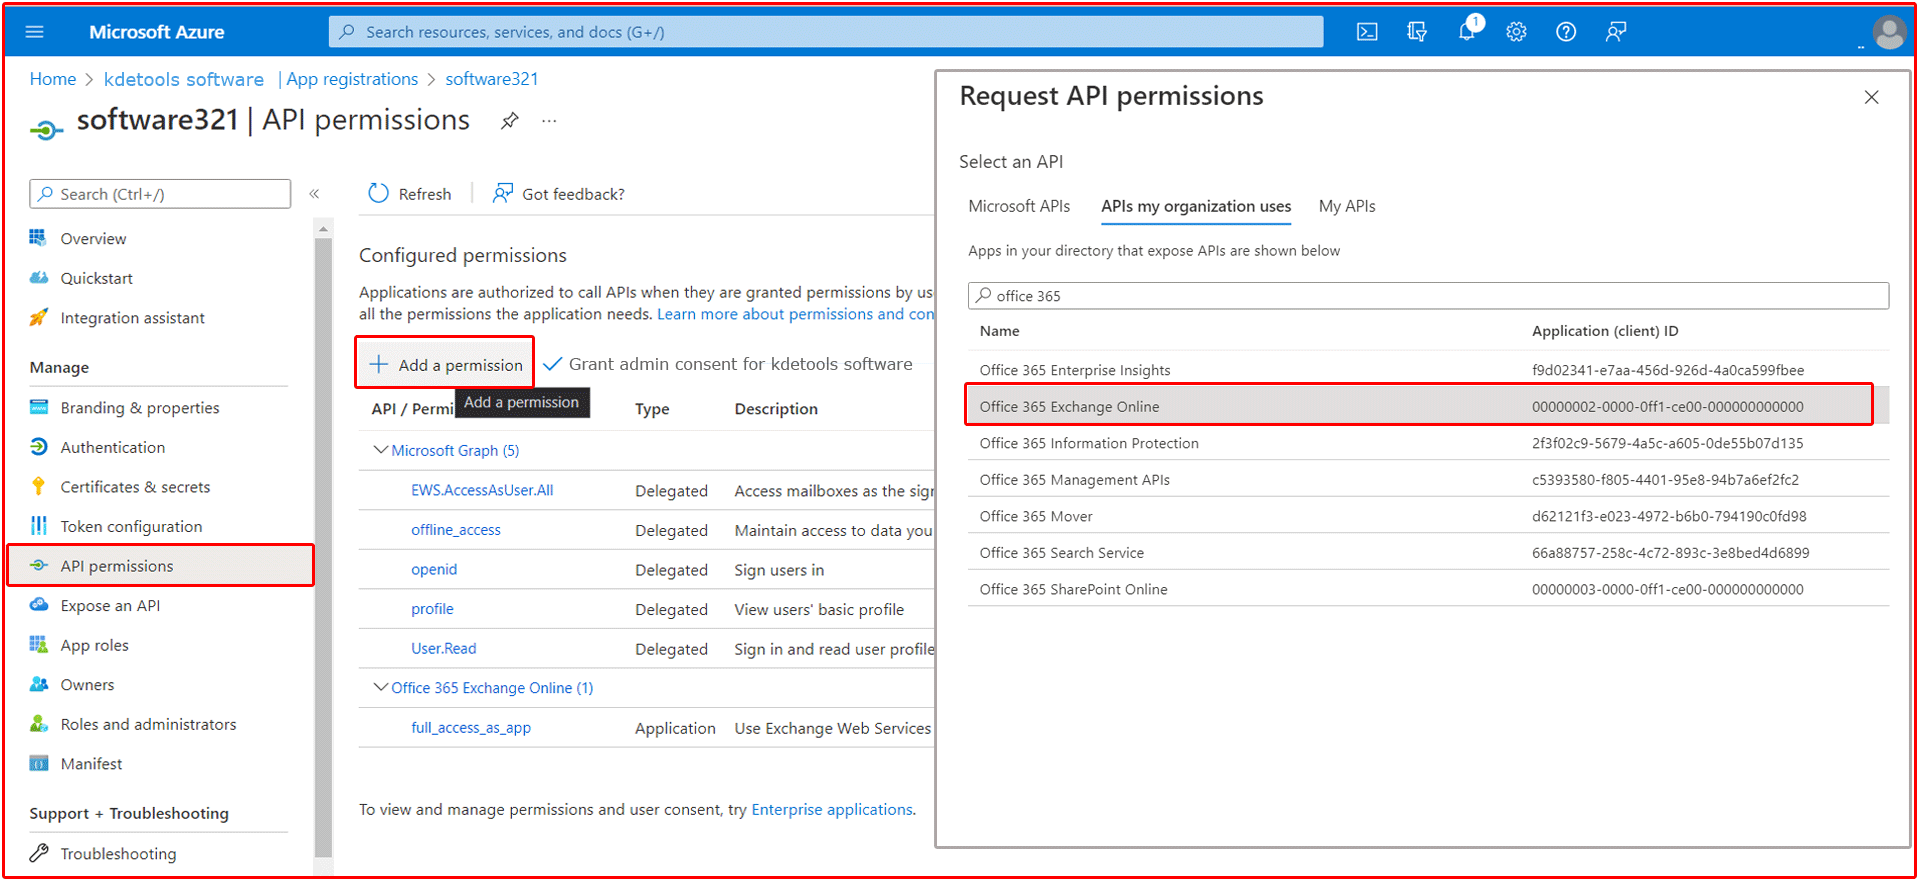
Steps: 9- API Permission
tab1:- Click to Left Side On "API Permission" Link
tab2:- Click to + Add Permission
tab:3- Select an API
tab:4- APIs my organizatio uses
tab:5- Search and Select "Office 365 Exchange Online"
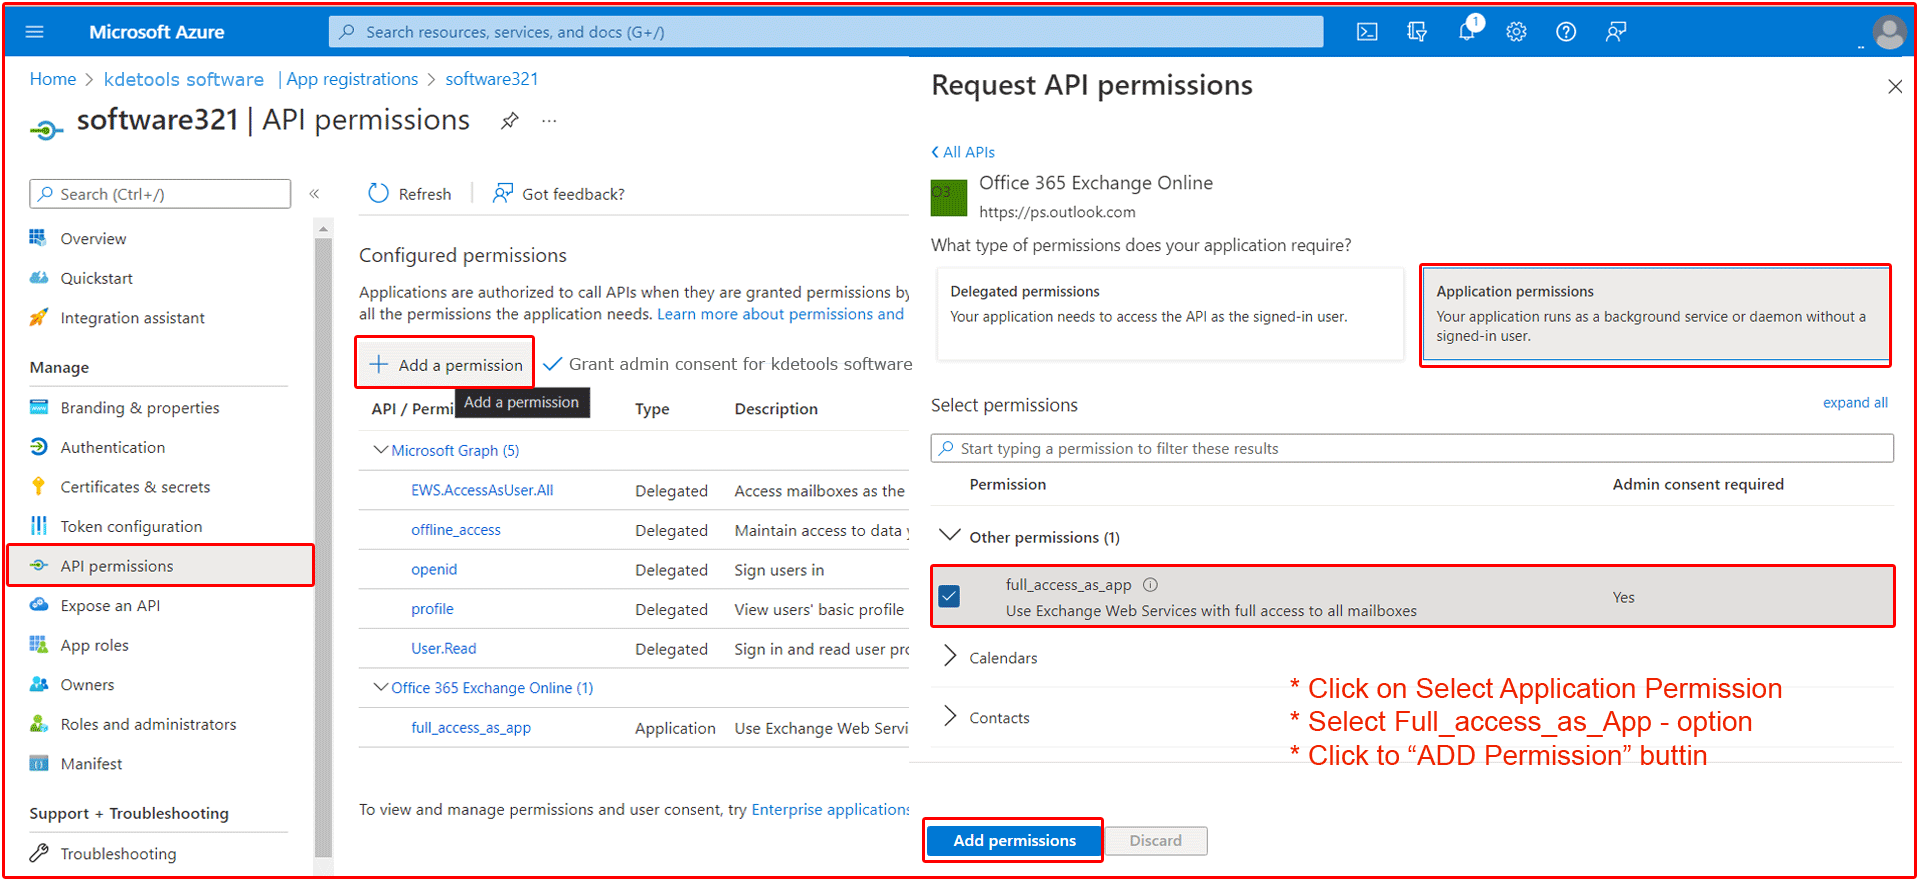
STeps:10- Request API Permission >> Application Permission
tab:1- Select a "Application Permission"
tab:2- full_access_an_app - Uses Exchange Web Servies with full access to all mailboxes
tab:3 - Click to "Add Permission" button
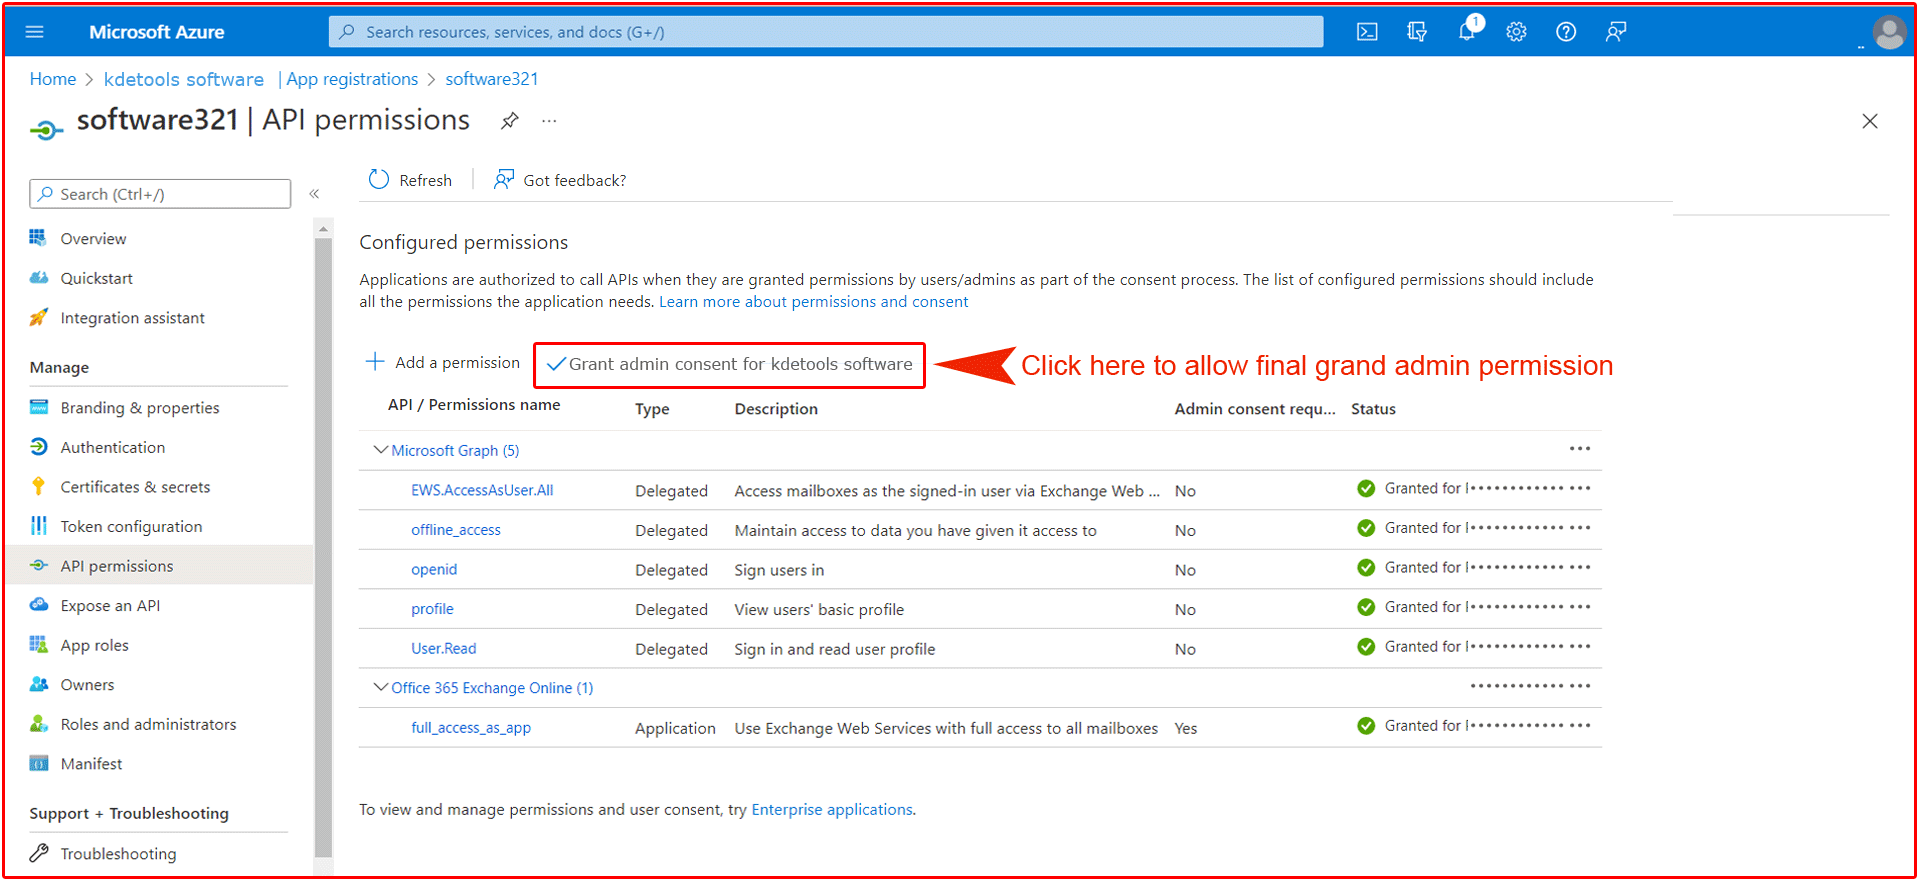
STeps:11-: Request API Permission >> Grant admin consent
tab:1- Click to [Grant admin consent for "Your Organization Name"] link
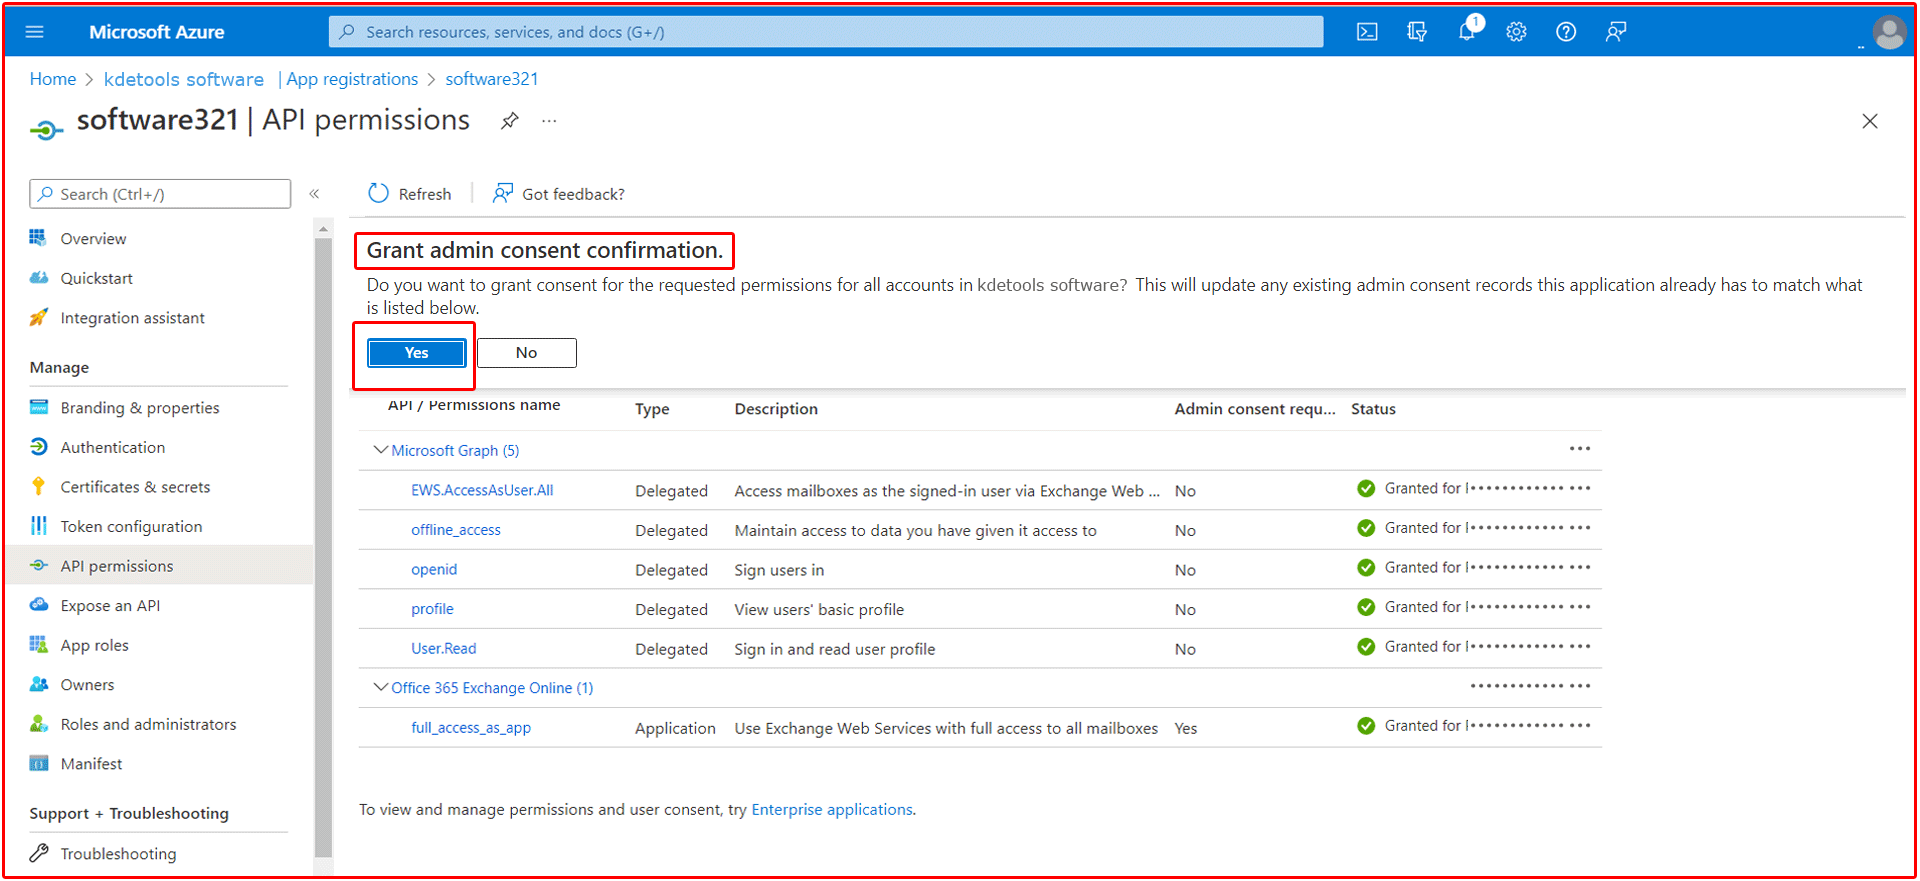
STeps:12-: Request API Permission >> Grant admin consent >> Confirmation
tab:1- Click to "Yes" Button
tab:2- Refresh
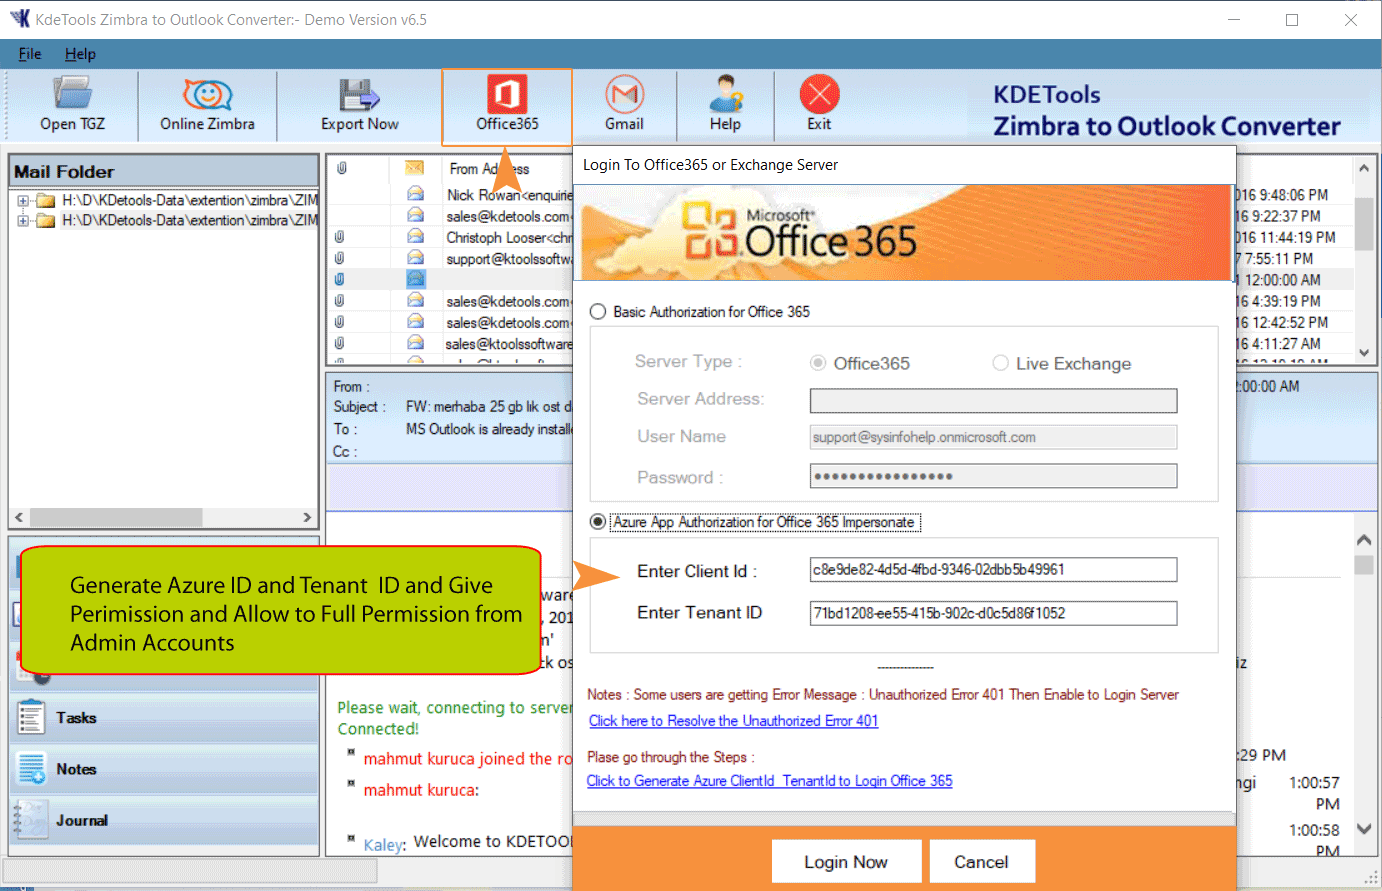
STeps:13- You can see here permission has been granted by "Microsoft Azure App" and Enter the "Client ID" and "Tenant ID" - To Login Office 365 accounts with Software Panel
tab:1- You can Found Client Id and Tenant Id into Azure Portal - App Overview section
tab:2- You can Copy & Paste Client Id and Tenant Id
tab:3- Click to "Login Now" button
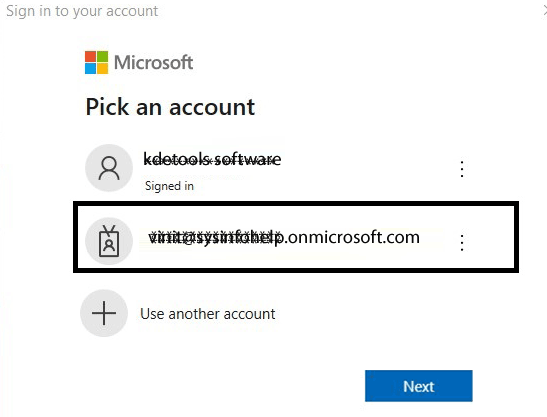
STeps:14- You can validate Login to Micriosoft Open Dialog
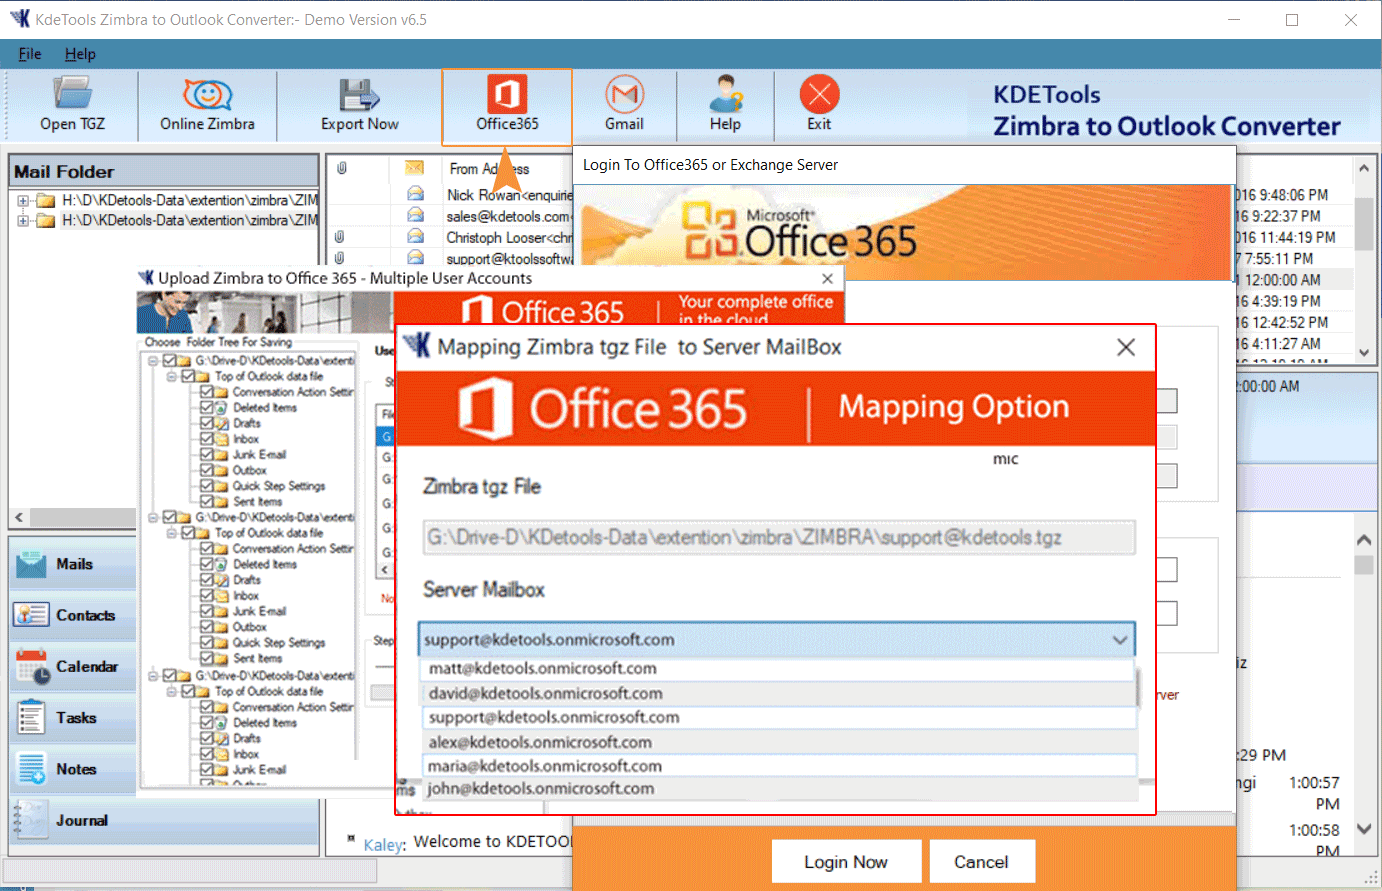
tab:1- Enter Global Admin Email Address or Select Email Address
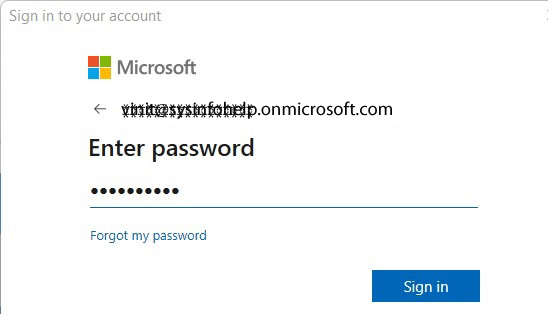
STeps:15- Enter Global Admin Password
tab:1- Click to Sign In Button
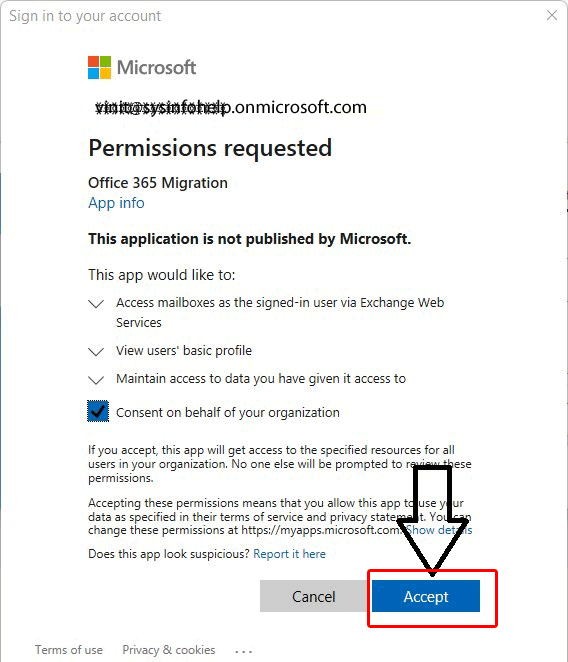
STeps:16- App Permission Request
Checked - Consent on behlf of your Organization
Click here Accept button
You are successfully login office 365 with Global Admin Account to Showing Admin Panel with Software
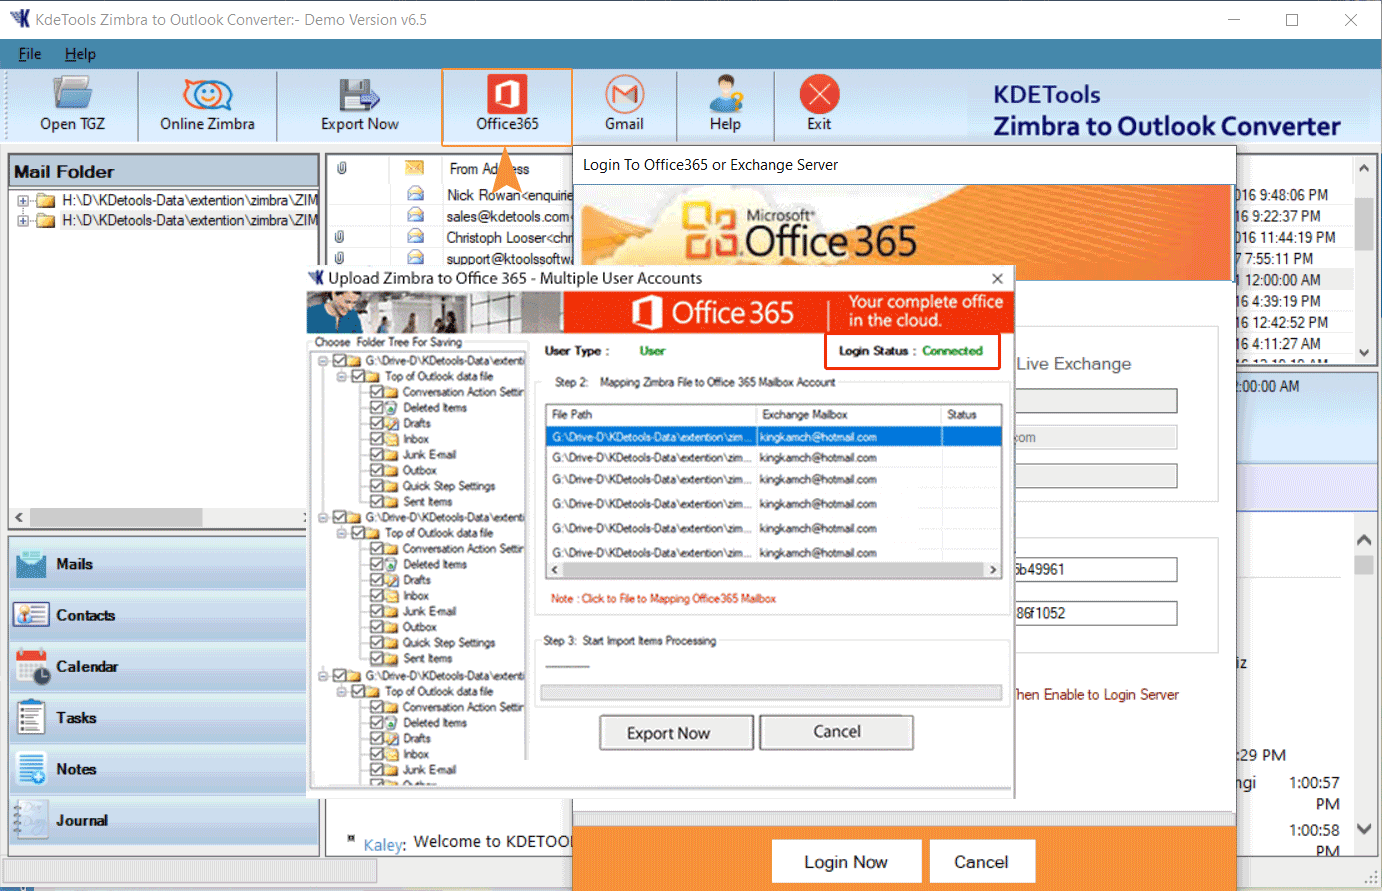
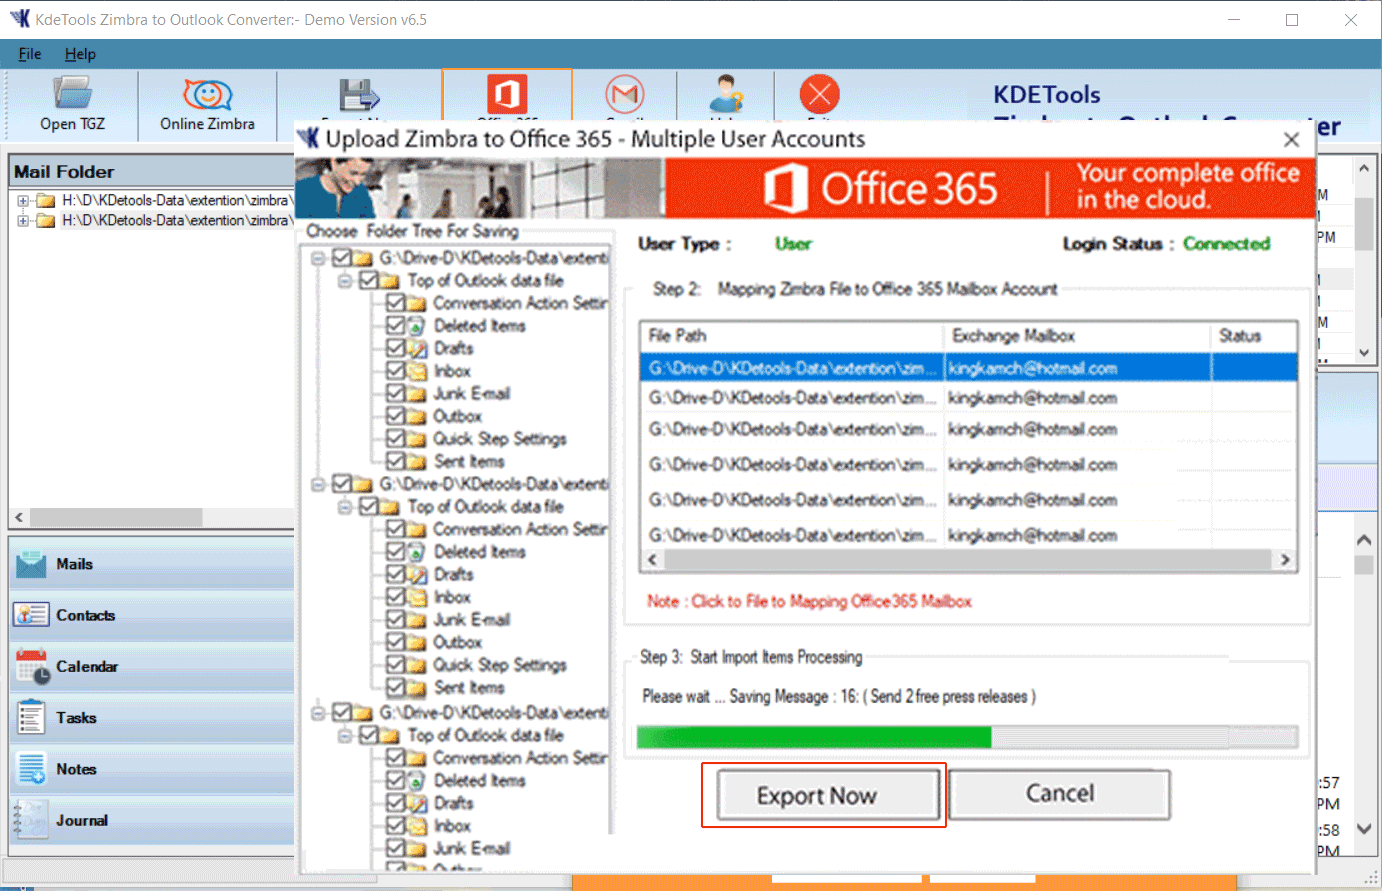
Mapping Option:- Click on "Move multiple Zimbra Mailboxes to Multiple Office 365 Accounts Processing".
Click to "Convert Now" button to start Uploading Process:".
A Comprehensive Guide on How to Fix the Unauthorized Error 401 While Office 365 Conversion:
https://www.kdetools.com/support/how-to-fix-the-unauthorized-error-401-while-office-365-conversion.html
How to Grant Permissions to Other Microsoft 365 Mailboxes?:
https://kdetools.com/support/how-to-grant-permissions-to-other-office-365-mailboxes.html
Related Blogs
Related Blogs


![]()
D - 478, Sector - 7,
Dwarka, New Delhi - 75
India
Call Us
91-9555514144
You can also find us:
![]()

![]()
KDETools Software® is the Registered Trademark of KTools Software Pvt Ltd
© Copyright 2019 www.kdetools.com. All Trademarks Acknowledged.